Let’s start with the basics: what is a mezuza (mezuzah)? It’s basically a rolled parchment with some verses on it, put into a tube or case and attached to the doorways in Jewish homes. The mezuza is the scroll itself, but the term can refer to the scroll and case. Why do we put them up all over our houses? Because we are commanded:

So we do. A mezuza in our house is one way we protect our house – it’s a way to consecrate our house. It says that Hashem is watching over our house and that we are faithful. (Here’s the wiki page on it for all sorts of interesting details, like court cases about mezuzot, in case you’re interested. Mezuzot mean a lot to a lot of people.)
After our recent move, we found we needed mezuzot – and a lot of them! This house has doors between every room, which means we have lots of door posts that need mezuzot (doors like bathroom doors don’t get a mezuza). More blessing for us, right? Only we left both our scrolls and our cases with our home in the US (well, with our Jewish tenants, actually). So we needed to make a lot of cases to cover the lot of scrolls that we bought. Here’s how we did it.
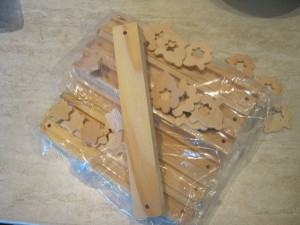
These are wooden mezuza cases we purchased from Just for the Mitzva, a bulk Jewish craft site. I find this is a good one to have for birthday parties, mitzvah parties, and occasions like this! We purchased three mezuza sets: the mosaic mini tile, hamsa, and jewish star.
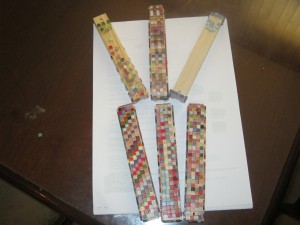 First comes our mosaic mezuzot. These came with enough tiny glass tiles to do the front of 12 mezuzot. The kids really wanted to do the sides, too, because when you are in a room looking out, you see the sides more than the front. So we did! The first in the top row was done by my now 3 year old son – I added the shin, though. These took a while for the boys, but they really enjoyed the work.
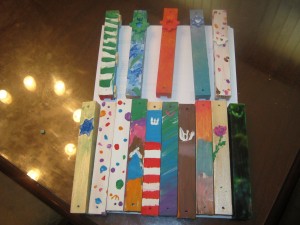
Next up are the painted mezuzot. We used acrylic paints (except for the one on the bottom right, which is the finger paint of my three year old sealed with gesso) and let eveyone do whatever they wanted. I made a couple, too. Even dh got in on one! These were the easiest to make, and some of them have the wooden hamsa or star pieces on them. We just glued them on!
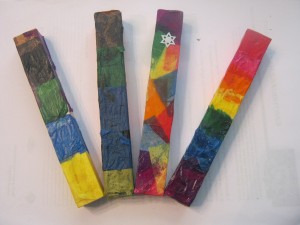
This next batch were made with tissue paper squares (bought from Oriental Trading) and glue. They were sealed with gesso.
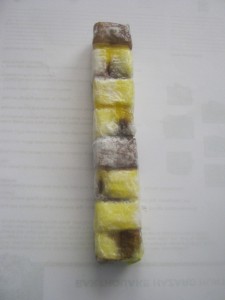
Last comes one I made. I wanted to do something a little nicer. So believe it or not, this started with tissue:
I folded the tissues from one side until I had strips of folded tissue. Then I applied it in rows, cutting around the back. I made seams in the front, too, for a little more realism. I used gesso to adhere it, and then put some pieces of brown and yellow tissue paper into break up the white. Then I covered everything with several layers of white tissue paper. (This photo looks more yellow than the case in person). Last, I used a popsicle stick to be sure the separations between the bricks didn’t get lost in the layers – I just defined the cracks with it.
And there you have it – a fun craft for the whole family that is a mitzva, too!


2 comments
Dear Amital,
I work for a wonderful Orthodox Jewish social enterprise whose profits go to people with LD in the London community. I really want them to get these bare wooden mezuzah cases to work on so we can sell it in our shop. I don’t see a way to order from Just for the Mitzvah…just a phone number. Is that how it works, or do you by any chance have an email for them.
All of this looks great!
Thanks.
Author
I don’t remember how I contacted them – this was a long time ago! But I went to the website and clicked on the “Contact” page and came up with this e-mail address: Support@jewishcrafts.com
Good luck!